User guide
Install it, then connect your first cloud
From installing the service on your computer, NAS or phone to creating an account, adding cloud storage, mounting a cloud as a local disk, and on to backup, encryption and WebDAV. Read the section for the device in front of you.
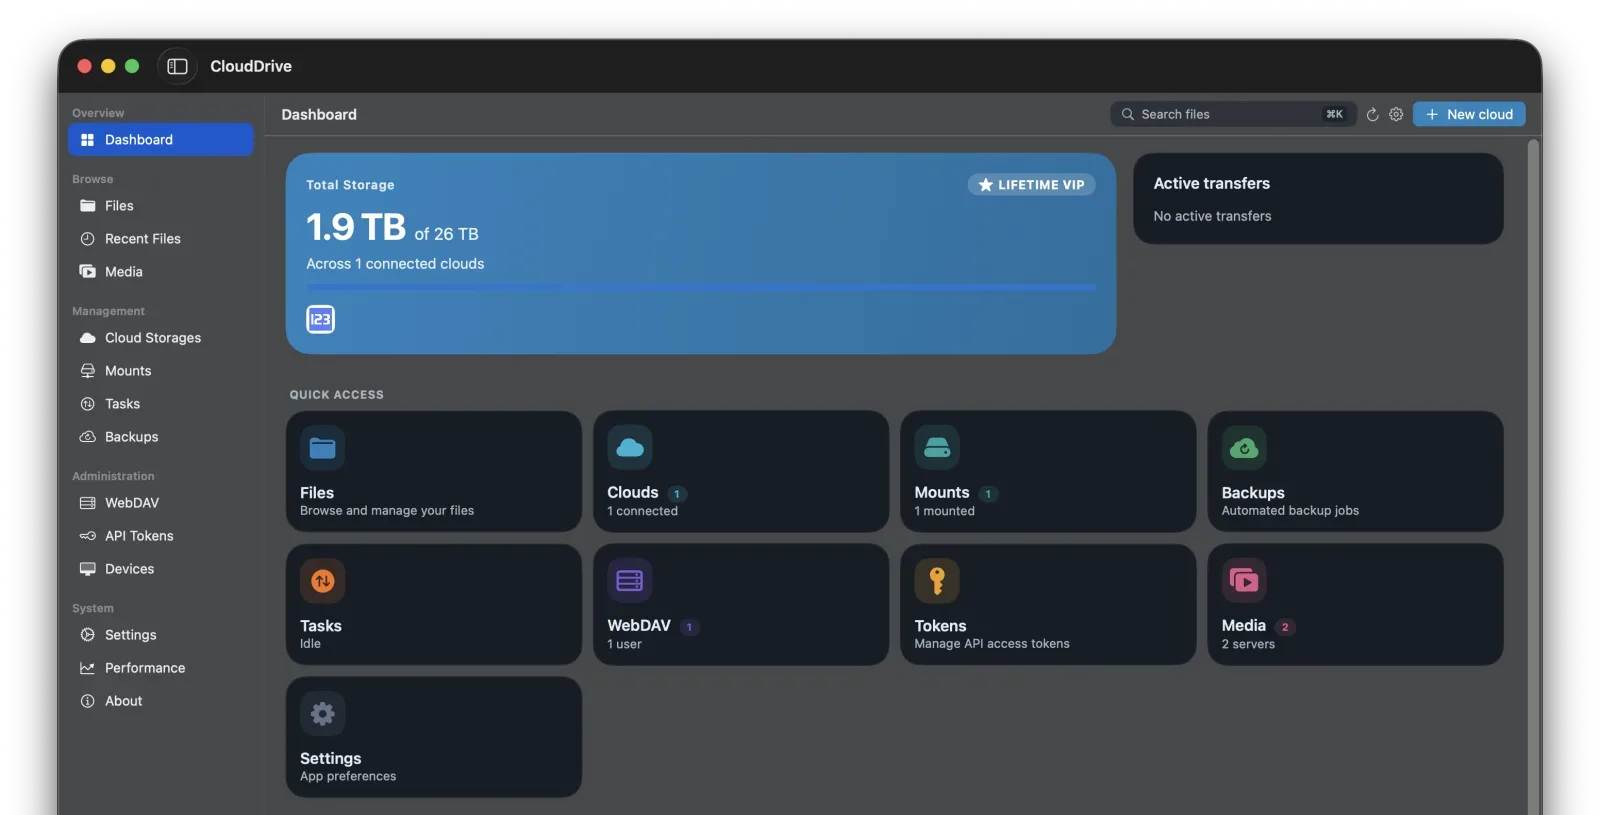
The first thing to do after installing
Open it in a browser
http://<host IP>:19798
The core service's management interface runs on 19798 — the same on Windows,
Linux, macOS, Android and inside Docker. On the machine itself, use
http://localhost:19798.
There is an HTTPS port too, 19799. It is off by default — turn it on and configure a certificate under Settings.
The core inside the apps listens on 29798 instead. The two are deliberately different, so a machine running both the core service and an app has no port conflict.
The whole interface is a WebAssembly application, so the browser has to support WebAssembly. One that does not shows a blank page — this is not a matter of losing a few features. Any recent Edge, Chrome, Safari or Firefox on a computer works, as do the mainstream browsers on phones and tablets. Internet Explorer does not, and neither do most of the browsers built into TVs, set-top boxes, e-readers and cars — on those, open it from a phone or a computer instead, or install the app for that platform.
Step one
Installing and running
This section covers installing the core as a background service — on a computer, a NAS or a router. The apps for phones, TVs and headsets carry the same core and need no server of their own; see On phones, TVs and headsets.
Windows
- Get the installer for your architecture (x64 or Arm64) from the download page.
- Run the installer and follow the on-screen prompts.
- When it finishes, a CloudDrive2 shortcut appears on your desktop. Double-click it, or
just open
http://localhost:19798in a browser.
1.0.7 raised the bundled WinFSP driver to 2026 beta1, fixing CVE-2026-3006 in older WinFSP builds. The in-app OTA updater only replaces CloudDrive2's own files and never touches the driver.
So what matters is not the version you are on now, but the version you last ran a full installer for. If that was older than 1.0.7, your driver is still the old one even if OTA has since carried you to the newest release — download the full installer, run it again, and restart when the wizard asks you to. If you cannot remember, just run it; there is no harm in doing so.
If your last full install was 1.0.7 or later, the driver is already the fixed one and the in-app updater handles every upgrade from there.
The core service registers itself as a Windows system service, starts with the machine and keeps running whether or not anyone is logged in. The Windows app is different — an ordinary application that starts with your account.
The installer, the service and the WinFSP driver are all code-signed, and some antivirus products still block one of them: the service will not start, the mounted drive never appears, or the app is closed outright. When that happens, add CloudDrive2's install directory and WinFSP to your antivirus allowlist. If the console will not open at all, common problems has the full checklist.
To reach it from another machine on the network, Windows Firewall has to allow the port: 19798 for the core service (plus 19799 if you enable HTTPS), and 29798 for the app. Windows usually prompts once during installation; if that prompt was dismissed, add it under Windows Security → Firewall & network protection → Allow an app through firewall.
Windows 7 is no longer supported — the TLS stack and runtime it ships with cannot meet what the current version needs. Older machines can run the Linux or Docker build instead.
Linux, generic
- Check that your kernel supports FUSE by looking for the
/dev/fusedevice. Without FUSE support you cannot mount clouds as local directories. - To run CloudDrive2 as a non-root user, install fuse3 the way your distribution's manual
describes, confirm that the
fusermount3command runs, then edit/etc/fuse.confand remove the leading#from theuser_allow_otherline. - Download the archive for your CPU architecture from the download page.
- Open a terminal and change into the directory holding the archive.
- Extract it:
tar zxvf clouddrive-2-linux-$ARCH-$VERSION.tgz - Change into the extracted directory and run:
./clouddrive - You can add clouddrive to your system's startup items or register it as a system service. See your distribution's documentation for how.
Arch Linux
- Arch Linux and its derivatives can install from the
AUR package
or a third-party repository:
yay -Syu clouddrive - Start clouddrive with systemd and enable it at boot:
# as root systemctl enable --now clouddrive.service # as your user systemctl --user enable --now clouddrive.service - Check that clouddrive is running:
# as root systemctl status clouddrive.service # as your user systemctl --user status clouddrive.service - Open the management interface in your default browser:
# recommended xdg-open http://localhost:19798 # IPv4 xdg-open http://127.0.0.1:19798 # IPv6 xdg-open http://[::]:19798 - If the page loads slowly or stutters, open it in your browser's private or incognito window.
- Mounting a local disk after signing in asks for a UID and GID:
# current user id -u id -g # another user id -u username id -g username - The AUR package's local disk mount point:
/media/clouddrive. - The AUR package's WebDAV mount point:
/media/clouddrive-dav. This one needs thedavfs2package. - Put your WebDAV username and password into
/etc/davfs2/secrets, for example:cat << EOF | sudo tee -a /etc/davfs2/secrets # personal webdav, application password /media/clouddrive-dav user@email.com mypassword EOF - Start clouddrive-dav with systemd and enable it at boot (as root):
systemctl enable --now clouddrive-dav.service - Check that clouddrive-dav is running (as root):
systemctl status clouddrive-dav.service
macOS
With Homebrew (recommended)
- Make sure Homebrew is installed.
- Install macFUSE before running
CloudDrive2, and approve its kernel extension in System Settings — an Apple silicon Mac
needs a trip to Recovery first, described in
letting macFUSE through. Homebrew can install it too:
brew install --cask macfuse - Install CloudDrive2:
brew tap cloud-fs/clouddrive2 brew install clouddrive2 - Start CloudDrive2:
This creates a background service that starts again the next time you log in.
brew services start clouddrive2 - Open http://localhost:19798 in a browser to reach the management interface.
- Stop CloudDrive2:
brew services stop clouddrive2 - Uninstall CloudDrive2:
brew services stop clouddrive2 brew uninstall clouddrive2 - Upgrade CloudDrive2:
brew services stop clouddrive2
brew update
brew upgrade clouddrive2
brew services start clouddrive2
Manual install
- Install macFUSE first and approve it as described in letting macFUSE through.
- Download the archive for your CPU architecture from the download page.
- Open a terminal and change into the directory holding the archive.
- Extract it:
tar zxvf clouddrive-2-macos-$ARCH-$VERSION.tgz - Change into the extracted directory and run:
./clouddrive - You can add clouddrive to your login items or register it as a system service. See the macOS documentation for how.
For what differs between the Mac App Store build and the direct download, see CloudDrive2 for macOS.
Android
- Take the
.apkfrom the "core service" section of the download page, install it and open it. It carries its own web management interface. - An un-rooted device cannot mount clouds into the local file system. Everything else still works, including multi-cloud backup and the WebDAV service. Without root you can also go through Android's Storage Access Framework, which lets any SAF-aware app read and write files in CloudDrive2 directly.
The CloudDrive2 app with the player is a different package — from Google Play or the app section of the download page.
Docker, NAS, Synology and QNAP
To run it in a container on a NAS or server, the image is cloudnas/clouddrive2.
The host needs shared mount propagation, which many systems already have. How to check it,
how to enable it when needed, and a configuration you can copy as it stands are all in the
Docker deployment guide.
The third-party Synology and QNAP packages are on the download page.
Synology users take note: File Station cannot create or delete files on a mounted drive. That is a known issue on Synology's side — the ways around it are under common problems.
Mounting over FUSE inside a container runs into fnOS's namespace limits and fails with
mount syscall failed in pid 1 namespace. The native fpk package does not have
that problem; it is on the download page.
Step two
Connect your first cloud
Register, sign in, add cloud storage. All three happen in the management console in your browser, and the flow inside the apps is the same.
-
Register
The first time you run CloudDrive2, click Register in the top right corner and enter your email address and a password. A verification email goes out to that address; follow the instructions in it, and you are taken to the sign-in page.
-
Sign in
Click Sign in in the top right corner and enter the same email address and password. If the account is verified, you land on the CloudDrive2 home page.
-
Add cloud storage
Go to Cloud Storages, click Add Cloud Storage, pick your provider from the list, and either scan the code or fill in the account details. Once it verifies, that cloud appears in My Files alongside the others.
A free account connects 2 clouds and creates 1 local mount; core membership lifts both limits. See pricing for what each tier includes.
Step three, optional
Mounting a cloud as a local disk
Once it is mounted, a cloud is an ordinary disk in Explorer, in Finder and on the command line. Any program can open the files in it directly, with no download first. This is where CloudDrive2 parts company with a cloud provider's own client.
Creating a mount point
- Go to Mount Points and click Add Mount Point.
- Mount Name: anything you like; it is a display name.
- Source Directory: the directory to expose. It can be a cloud's root or any
folder inside it;
/mounts every connected cloud at once. - Mount Point: a drive letter on Windows, an empty directory on Linux and macOS.
- Options: Read Only guards against accidental writes and deletions; Auto-mount on startup brings it back up with the service.
- Linux and macOS also have Advanced Settings for the UID, GID and permissions
(
0755by default), which decide who owns the mounted files.
What each system needs
| System | Prerequisite | What goes in Mount Point |
|---|---|---|
| Windows | WinFSP — the Mount Points page has a one-click install button, once per machine | A drive letter, e.g. X: |
| macOS | macFUSE and its kernel extension approval; Apple silicon needs a trip to Recovery first | An empty directory |
| Linux | FUSE support in the kernel; running as non-root also needs fuse3 and
user_allow_other |
An empty directory |
| Docker | The container needs FUSE privileges, and the mount path needs shared
propagation to be visible on the host |
A directory inside the container |
| Android | Local mounting requires root | An empty directory |
On Windows a mount can be presented as a Local or a Network drive. Some programs only recognise one of the two, so if a mount fails or an application cannot see it, try the other type.
That is almost always shared mount propagation. Start the container with
--cap-add SYS_ADMIN --device /dev/fuse --security-opt apparmor:unconfined (or
plain --privileged), and map the mount directory with :shared. The
full configuration is in the Docker deployment guide.
The apps
On phones, TVs and headsets
The app is not a remote control for the server above. It carries the whole core: install it, sign in, add a cloud, done — no server needed. If you already run one, the app can connect to it instead.
On its own
Register or sign in to the same CloudDrive account inside the app, then add cloud storage — exactly the steps you would take in a browser. A phone with no server anywhere can still browse, play and back up.
Against an existing server
If CloudDrive2 already runs on your NAS, create an API token there and add that server in the app using its address and the token. Offline downloads, search and cross-cloud copying are then available from the app directly.
Membership and App Pro
Core membership and App Pro both live on your CloudDrive account, not on a device and not in a store. Whichever platform you bought on, signing in on another one finds them already unlocked.
Installing the apps
- App StoreiPhone · iPad · Mac · Apple TV · Vision Pro
- Google PlayAvailable now
- Direct downloadmacOS dmg · Android APK
What each platform can do and what it requires is on the apps pages.
Everyday use
What you will reach for next
Managing files
My Files puts every connected cloud side by side. Uploading, downloading, renaming, moving, deleting and creating folders all work across clouds, not just within one. There are list, grid and waterfall views, with sorting, search and multi-select.
Once a cloud is mounted as a local disk, the same files behave like local files in Explorer, in Finder or in any other program.
Deleting a file in CloudDrive2 deletes the real file on the cloud storage. Once it is gone it may not be recoverable, so check before you act.
Copying between clouds
Drag a file from one cloud to another the way you would within a single cloud. The hash is read from the source; if the destination uses the same hash algorithm and the hash is already known there, the copy is instant — the server just records a pointer to data it already holds and nothing moves. If the algorithms differ or the hash is not found, the data streams cloud to cloud without touching your local disk, at whatever your bandwidth allows.
You run it from My Files: select the files or folders, click Move/Copy to…, choose a destination folder in the directory tree and click Copy. The task runs in the background, so you can walk away; progress shows on the Tasks page, under both Copy Tasks and Upload Tasks.
Fast cross-cloud copying is a core membership feature. The slow path is not a fault — it means the destination has nothing to match against.
On the Cloud Storages page, Add Cloud Storage → Local Folder under Local Storages adds a directory from the machine, and a copy can use it as the source or the destination. As long as one end is a local folder — pulling files down from a cloud, or pushing local files up — free accounts can copy too, with no membership needed.
Copying into a local folder appears under Upload Tasks. Nothing is backwards: CloudDrive2 runs every copy as one pipeline — read the source, write the destination — and the writing half is always called an upload.
Backup
- Go to Backups, click Add Backup, and use the wizard to pick a source directory and one or more destinations. Local folders and cloud directories can each be either.
- Set the file filter rules (by extension or by name, applied to files and folders independently) and the completion rules — deleting the source file after upload, for instance.
- Backup works from real-time filesystem monitoring: a change in the source propagates as it happens. You can also schedule full scans to reconcile periodically.
Real-time monitoring only sees changes that happen inside CloudDrive2. Cloud providers do not offer file-change notifications, so when the backup source is a cloud directory, anything you upload, delete or rename in the provider's own app or website is invisible to CloudDrive2.
To make it notice: refresh that cloud directory in My Files. With Directory Cache Persistence enabled, the refresh compares what it reads against the stored cache, and the differences trigger live incremental backup as usual. A scheduled full scan will reconcile them too.
There are two paths. A deletion caught by real-time monitoring is unambiguous, and is applied to the destination according to your delete rule. A full scan can only observe "present in the destination, absent in the source" — which may not be a deletion at all, but a file moved elsewhere, and acting on it is risky. So whether a full scan may delete is left to you, in its "sync deletions" option.
That option matters most when the source is itself a mounted cloud, where real-time delete events do not always fire.
Full scans are resource-hungry. Backup Resource Limits sets the maximum number of concurrent scans (1 by default) and high and low water marks for the upload queue, so scanning a large tree does not pile up thousands of upload tasks.
Backing up photos and files from a phone
Backup on a phone is the same feature as on a computer. Only the source differs: a phone's photo library and folders have to be added as a local folder before a backup can use them as its source.
- Add the local folder first. On the Cloud Storages page, click Add Cloud
Storage, pick Local Folder under Local Storages, and choose the directory you want
backed up. iOS asks for photo library permission first, after which the library appears at
/Documents/Photos: pick that folder to back up photos and videos only, or its parent/Documentsto take the app's other files along with them. Android needs storage permission, and then you pick a directory under/sdcard: the camera roll is/sdcard/DCIM, downloads are/sdcard/Download, or take/sdcarditself to back up the whole of internal storage. - Then create the backup. On the Backups page, click Add Backup, set the source to the local folder you just added, and name one or more cloud directories as destinations.
- The destination can be an encrypted folder. Create an encrypted folder on the cloud first and choose it as the destination: photos and files are then encrypted locally before upload, and what the provider stores is ciphertext. That is an encrypted backup.
- Turn on File System Watcher. Enable it in the backup's settings and it monitors the source folder for changes in real time, so new photos, new videos and newly saved files are backed up on their own — nothing to trigger by hand.
On iOS the photo library is read on demand: the original is pulled from the system library only when the backup uploads it and released straight afterwards, so the library is never duplicated into the app's own storage.
Encrypted folders
Right-click any cloud directory and choose Create Encrypted Folder, then set a password. Files you put inside are encrypted locally — names and contents both — before they are uploaded, so the provider stores only ciphertext. Once unlocked, reading and writing is no different from an ordinary folder.
Lock it when you are done and the next access asks for the password again. Tick Save Password at creation and you will not have to enter it after a restart.
An encrypted folder's password can neither be changed nor recovered. Forget it and the contents are permanently inaccessible — to us as well.
The WebDAV service
CloudDrive2 serves every connected cloud back out over WebDAV, so any WebDAV-capable software can connect to it.
- Server address:
http://<ip>:19798/dav - Username: the email address you sign in with — or just the part before
the
@. - Password: the password you sign in with.
Core membership also lets you create separate WebDAV users on the WebDAV page, each scoped to a directory and each read-only or not, so you never have to hand out the main password.
API tokens
Third-party applications reach CloudDrive2 with an API token rather than your account password. On the API Tokens page, click Create Token; you can scope it to a root directory, give it an expiry, and set permissions per operation — file read, write and modify, system operations, cloud storage operations and account operations, each with its own sub-items.
Push Messages and Get Mounts are off by default and have to be ticked by hand. Without them the plugin connects, reports healthy, and never updates the library.
Offline downloads
In a supported cloud's directory, choose Offline download and hand a magnet link or a
.torrent file to the provider to fetch. It lands directly in the cloud, using
none of your bandwidth and none of your disk. A .torrent can be dragged
straight in — it is parsed into a magnet link and added.
115 also has an offline download manager for copying links, deleting tasks, restarting them, or clearing them in bulk by status.
Where the configuration lives
Configuration and data sit in one directory — systemsettings.json,
config.toml and log/ are all there. The core service and the apps
each have their own location, listed separately below.
The core service
Its location comes from the CLOUDDRIVE_HOME environment variable; with that
unset, it is Waytech/CloudDrive2 inside the home directory of the account the
service runs as.
| How it runs | Configuration directory |
|---|---|
| Windows core service | C:\Windows\System32\config\systemprofile\Waytech\CloudDrive2 |
| macOS / Linux, as your own account | ~/Waytech/CloudDrive2 |
| macOS Homebrew | ~/Waytech/CloudDrive2 for whichever account runs brew services |
| Linux as root | /root/Waytech/CloudDrive2 |
| Docker | /Config inside the container — the host directory you mapped to it |
| fnOS (fpk) | the package's own var directory, which the launcher puts into CLOUDDRIVE_HOME |
The Windows service path sits under System32 because the service runs as the
system account, and that is the system account's home directory.
The apps
Every platform app has the same core built in, but its directory is fixed inside the app's
own container and does not read CLOUDDRIVE_HOME.
| App | Configuration directory |
|---|---|
| Windows | %LOCALAPPDATA%\CloudDrive.WinUI — that is C:\Users\<your name>\AppData\Local\CloudDrive.WinUI |
| macOS | ~/Library/Group Containers/group.com.clouddrive2.CloudDrive2/CloudAPI, the same in the App Store and direct-download builds |
| iOS / iPadOS / visionOS | CloudAPI in the app group container of the same name, inside the app sandbox — the system exposes no path you can open |
| Apple TV | Library/Caches/CloudAPI in the app container — the only place tvOS lets an app write |
| Android (phone, tablet and TV) | /data/data/com.clouddrive2.CloudDrive2/files/CloudDrive2, in the app's internal storage, which needs root to reach |
| Meta Quest | /data/data/com.clouddrive2.clouddrive2.vr/files/CloudDrive2 |
On phones, tablets, TVs and headsets the directory lives inside the app sandbox: uninstalling the app takes it with it, and no file manager can open it. To back up or move a configuration, work from the core service side.
When in doubt, ask the running process. On Linux and NAS boxes:
tr '\0' '\n' < /proc/$(pgrep -n clouddrive)/environ | grep CLOUDDRIVE_HOME.
Running a program once startup finishes
The core service can run a program or script of your choosing once it has started and its mounts are ready. This solves a boot-order problem: anything that depends on a mount path — a Jellyfin or Emby container, or another service — sees an empty directory if it starts before CloudDrive2 does. Having CloudDrive2 restart it afterwards gets the path right.
- Give the core service the environment variable
ENABLE_RUN_AFTER_START=true. - Edit
systemsettings.jsonin the configuration directory and add a key:The value is split on whitespace into a command and its arguments; point it at a script if you need anything more involved."run_after_start": "docker restart jellyfin" - Restart the core service.
It runs an arbitrary command with the core service's privileges, so we do not expose it in the web interface. Using it requires access to the machine running CloudDrive2, to set the environment variable and edit the configuration file by hand.
The fnOS fpk package already ships with
ENABLE_RUN_AFTER_START=true, so there you only need to edit
systemsettings.json.
Account
Account and security
The cloud storage credentials held on our servers are encrypted with your password, and we do not store that password. Everything in this section follows from that.
Forgotten password
Click Reset on the sign-in screen and follow the instructions — a reset code goes to your email address.
Resetting clears the cloud storage credentials held on our servers and resets your password. You will have to add your cloud storage again afterwards. Your membership is unaffected.
Changing your email or password
Both live on the Profile page. Changing your email sends a verification code first and takes effect once you enter it. Changing your password does not disturb the cloud storage you have already added.
Accounts signed in through Xunlei or a partner device can change only the parts the system allows; the page spells out which.
Two-factor authentication
Turn it on from the Profile page. Scan the code with any TOTP authenticator app; once it is bound you get a set of recovery codes. Keep them somewhere separate — they are how you sign in if you lose the authenticator.
On the sign-in screen choose "Lost your authenticator? Disable 2FA by email". A verification code goes to the account's email address; that code plus your password turns two-factor off, and you sign in with email and password as before. The code is valid for 30 minutes.
Detaching a device
An account registered automatically by a partner device can be detached from that device once you have changed the email address and password. If a device is lost or sold, detaching it keeps the account out of someone else's hands.
An offline device may still hold saved credentials, so change your password once more after detaching to close that path for good.
Troubleshooting
Common problems
The ones we are asked about most, answered as we answered them on GitHub issues and at the support inbox.
Behind a reverse proxy, the interface hangs on "Connecting…"
The cause is the reverse proxy buffering the PushMessage gRPC-Web stream: the response headers never arrive, so the front end waits forever, and the dashboard's task count stops refreshing along with it. Turn buffering off for CloudDrive2's location and raise the read timeout:
location / {
    proxy_pass http://127.0.0.1:19798;   # your CD2 HTTP port
    proxy_http_version 1.1;
    proxy_set_header Host $host;
    proxy_set_header X-Real-IP $remote_addr;
    proxy_set_header X-Forwarded-For $proxy_add_x_forwarded_for;
    proxy_set_header X-Forwarded-Proto $scheme;

    # the important part: a streaming gRPC-Web call must not be buffered
    proxy_buffering off;
    proxy_request_buffering off;
    chunked_transfer_encoding on;
    proxy_set_header Connection "";

    # PushMessage is a long-lived connection, so the read timeout has to be generous
    proxy_read_timeout 3600s;
    proxy_send_timeout 3600s;
}
macOS says libfuse.2.dylib is missing
macFUSE is not installed. Mounting depends on it for libfuse.2.dylib. Install it
from macfuse.github.io, then approve
its kernel extension as described in
letting macFUSE through — an Apple silicon Mac also needs a
trip to Recovery.
Adding Google Drive says "This app has been blocked"
Use your own Google OAuth credentials and the block does not apply. In the Google Cloud Console, create a project, enable the Google Drive API, configure the OAuth consent screen and add yourself as a test user, then create an OAuth client ID for its client_id and client_secret. Enter those when you add Google Drive in CloudDrive2, and the authorisation runs through your own application.
The 115 QR scan succeeds but the cloud never appears
The old private "115" interface has been retired: the scan succeeds but the connection cannot be made. Switch to 115open — remove the existing 115, add 115open, then rename it back to the old name. The mount path stays the same, so your existing mount points and backups need no changes.
If instead you get a network error, the machine probably cannot reach the 115 or Tianyi sign-in endpoint. Check DNS and any proxy, then try again.
115 suddenly slows down, errors out, or shows 0 capacity
Most of the time this is a temporary restriction on 115's side, not a CloudDrive2 problem. Too many requests in a short window trips 115's risk control, which usually lifts itself in about half an hour; downloads pinned to a few MB/s are usually a temporary per-account speed limit that clears within 24 hours. Slow in the evening but fine during the day is 115's own policy — no setting changes that.
What you can do: keep the default settings rather than raising concurrency, and use one 115 account from one CloudDrive2 machine — the same account accessed from several machines at once trips risk control much more easily.
123 Pan cannot be added, or authorization fails
123 Pan changed its API endpoint, and older CloudDrive2 releases still talk to the old one. Update to the latest version, then add 123 Pan again.
Adding a second account of the same cloud signs into the first one instead
The browser still holds the first account's session on the cloud's own website. Open CloudDrive2 in an incognito (private) window and add from there, or sign out on the cloud's website first. That is how you add two Baidu Pan or two 115 accounts.
The log keeps printing "too many requests"
Aliyun Drive and some other providers rate-limit API calls, and this is what the refusal looks like. CloudDrive2 waits and retries automatically until it succeeds, so these log lines need no action. They do not interrupt writes on a mounted drive either: writes land in a local temporary file first, and the upload happens asynchronously in the background.
Nothing answers on 19798 on Windows
Work through these in order — most cases give themselves away at the first step.
- Check the service is running. Press Win+R, open
services.mscand find CloudDrive2 Service (service nameCloudDrive2). Status should be Running and Startup type should be Automatic. If it is stopped, right-click and start it; if the startup type has been changed to Manual or Disabled, put it back to Automatic under right-click → Properties, or it will not come back after a reboot. The command line shows the same thing:sc query CloudDrive2 - Running, but unreachable from another machine. That is Windows Firewall
not allowing the port — 19798 for the core service, plus
19799 if you enabled HTTPS. If
http://localhost:19798works on the machine itself and nothing else can reach it, this is almost always why. - The service will not start, or stops right after starting. Usually antivirus. Add CloudDrive2's install directory and WinFSP to the allowlist and try again.
Antivirus flags the installer
It is a false positive. The installer is code-signed, and the is-XXXX.tmp file
being flagged is just Inno Setup's temporary unpacking file, misjudged by a heuristic
engine. Add the installer and its target directory to your antivirus allowlist, and report
the false positive to the vendor.
It can also be blocked after installation: the service does not start, the mounted drive never appears, or the app is closed outright. Signatures do not stop a heuristic engine, so add CloudDrive2's install directory and WinFSP to the allowlist as well.
Network errors (dns error, connect error) when adding a cloud or checking for updates
Errors carrying "dns error" or "connect error" point at the network of the machine running CloudDrive2: check its DNS and proxy settings, and for Docker deployments check that the container can reach the internet at all. The management page is often open on a different device — your browser being online says nothing about the machine running the service. Test from that machine (or inside the container), for example by curling the URL from the error message.
Emby / Jellyfin in Docker sees the mount folder but nothing inside it
This is Docker mount propagation: CloudDrive2's FUSE mount appears after the container
started, and the default propagation mode hides mounts that arrive later. Add
:rslave to the Emby / Jellyfin container's volume mapping — for example
-v /mnt:/mnt:rslave — and recreate the container.
Direct links are enabled for 115, but traffic still flows through the server
Direct links work between two CloudDrives: a remote CloudDrive client asks the server for a direct download URL, and only then does the data bypass the server. Browsing files through the web interface does not use direct links — that traffic still passes through the machine running CloudDrive2.
WebDAV from the iPhone / iPad app will not connect
Check the port first: the service built into the phone and tablet app listens on
29798, not the core service's 19798. Point your player at
http://<device IP>:29798 and try again.
A mounted drive on Windows cannot be shared, or other programs cannot see it
Mount points on Windows belong to the account that created them. The core service runs as the system account, so the drives it mounts belong to the system account; the Windows app is an ordinary program running as your signed-in account, so the drives it mounts exist only in your own session. Neither can see the other's — that is how Windows works, not a misconfiguration.
To share a mounted drive over SMB, it has to be mounted by the core service. Windows' SMB server also runs as the system account, so the only mounts it can see, and therefore share, are the ones the system account made. A drive mounted by the app is invisible to it.
Share it as a local disk rather than a network location — to Windows it is a local disk. The same reasoning applies to anything else running as a service: media servers, backup software and scheduled tasks all need the core service's mount, not the app's.
File Station on Synology cannot create, rename or delete files on the mount
Synology's own File Station does not support write operations on a FUSE-mounted filesystem. This is a known issue on Synology's side and a lot of users hit it: the mount point opens, files read and play, but creating a folder, renaming, deleting, moving and uploading all fail.
The mount itself is fine — the same mount point reads and writes normally over SSH or from another file manager.
Two ways around it: point File Station at CloudDrive2's WebDAV service rather than the FUSE mount path, or use a third-party file manager on the NAS. It is also worth reporting to Synology — the more reports it gets, the likelier it is to be fixed.
Mounting fails with "IO Error: mount point is not empty"
The mount point directory has to be empty. This error is most common right after a reboot: some program that also uses the path — Emby, a download tool, a backup script — started before the CloudDrive2 service and wrote into the directory before it was actually mounted, and CloudDrive2 refuses to mount over a non-empty directory.
To fix it, stop whatever is writing there and clear out what was left in the mount point directory — those files are on the local disk, not in the cloud, so check whether anything needs keeping first — then mount again. To stop it recurring, make the programs that depend on the path start after CloudDrive2: set their service to depend on the CloudDrive2 service, or give them a delayed start.
It will not install or sign in on Windows 7
Windows 7 is no longer supported: the TLS stack and runtime libraries it ships with cannot meet what the current version requires for secure connections and its dependencies. Use Windows 10 or 11; if the hardware has to stay, consider the Linux or Docker build instead.
Still stuck?
Bugs and feature requests are best filed as GitHub issues, where they stay on the record. Someone is usually around in the Telegram group, or write to us directly.